A miniature replica of the Taig Micro Lathe II
- A PROJECT IN THE MAKING -
Looking around my workshop for some interesting shapes to carve out using my new Taig Mill, the first thing I spotted was my 1986 Taig lathe.
It has lots of slots and grooves - a perfect practice project. Originally, I had only intended to copy a few parts of the lathe in miniature, but I just couldn't stop!
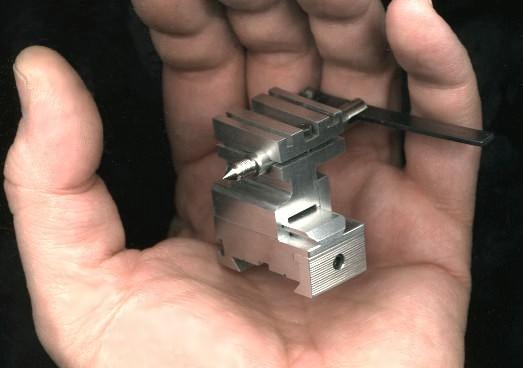
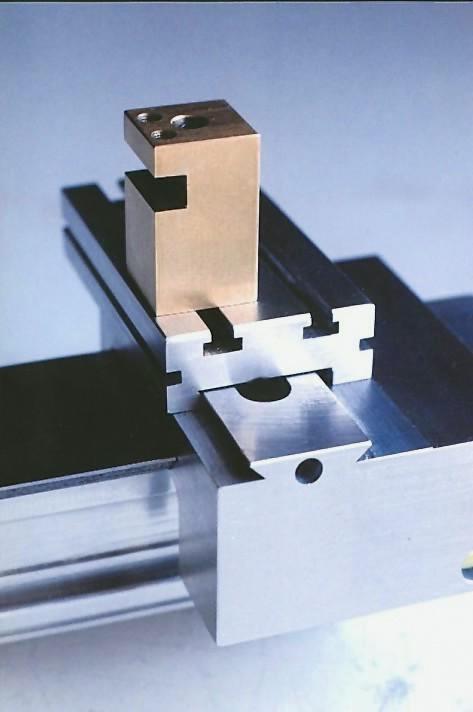
The Micro Lathe II's signature drilling tailstock is the Taig's most recognizable feature.
This miniature tailstock replica reflects the original style prior to the addition of the small brass seat for the drill chuck located on the ram and the removable pin in the linkage. Eagle-eyed Taig enthusiasts have probably already noticed these differences in the picture and that one T-slot has yet to be finished!
Taig has also changed the tailstock's upper extrusion minutely since the 1980's, allowing the T-slots to be enlarged slightly and centered in their respective lands on top of the tailstock. In addition, the upper dovetail three-screw clamping arrangement was also changed to a single-screw method in the process.
Although photographed early on in the project, this image gives some indication of the size of this model.
I debated for some time about what model year would best represent the classic Taig Lathe. I decided to follow my own mid-80's version, but to copy the new style pulley, with the blank area in the middle of the V-belt grooves. As the pulley is often considered a separate accessory, this seems an acceptable way to keep the basic lathe authentic and yet span the production years of the most recognizable Taigs.
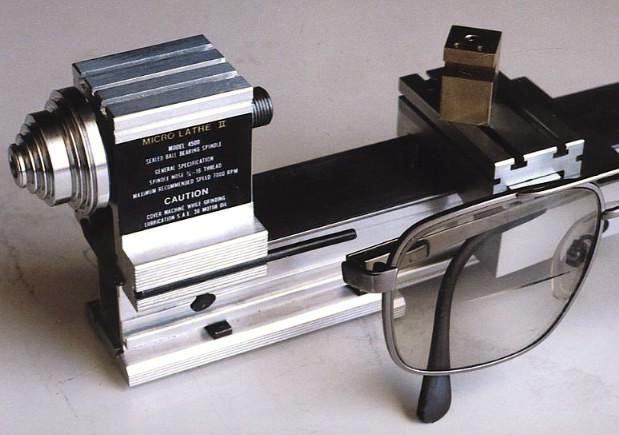
Here is an even earlier shot which reveals the headstock prior to boring for the bearings and adding the dovetail slot for the nameplate. Also missing are the fine grooves from the bottom of the headstock.
Taking these pictures without my eyeglasses on proved as difficult as many of the machining operations!
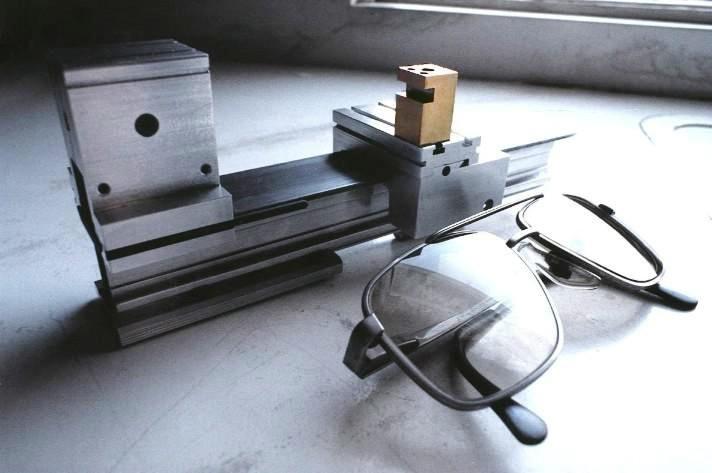
The headstock awaiting more milling operations on the sides.

I hope to black anodize the headstock half pieces when they are finished to create the true appearance of the prototype. The cross slide is destined for the familiar green anodized treatment. In the meantime I am appreciating the beauty of the Taig's raw design, unhampered in the "all-metal" look of the machine.
I chose to chamfer the top edges of the toolpost as on present day Taig models, unlike those in my own collection of unused 1980's toolposts. I felt I could take this liberty without compromising authenticity since these toolposts are considered expendable components.
An early mockup of the major parts for the bed and carriage assembly.
When I started to build this thing, I had no idea how I could cut such small T-slots without buying expensive cutters. I thought this might give me a convenient point to lay the project to rest, as it was started only as my first milling exercise and it didn't need to be finished. I rifled through a drawer of ruined drill bits and noticed that flutes are quite sharp....... A 3/16" HSS bit went into the 3-jaw chuck, I grabbed the Dremel flex shaft with a grinding disk affixed and in four minutes I had made a T-slot cutter.
The homemade T-slot cutter between the pencil and a keyway cutter
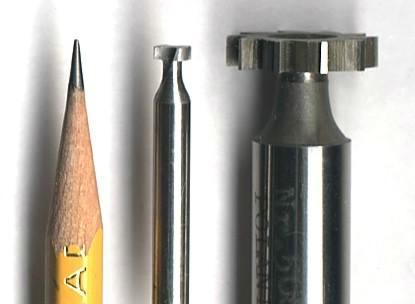
I am not recommending the above procedure to people who don't have experience with high speed grinding disks and two simultaneously rotating spindles or who don't choose to use full head protection.
Flatbed scanners tell no lies, but are prone to exaggeration and distortion, like some of their owners!
Bearing this in mind, the milling marks on the ways seen in the image below were only visible under special lighting conditions and were later removed in the first few strokes of the hand lapping process.
This scan of the carriage saddle shows the 1/8" x 40 TPI left hand thread on the feedscrew.
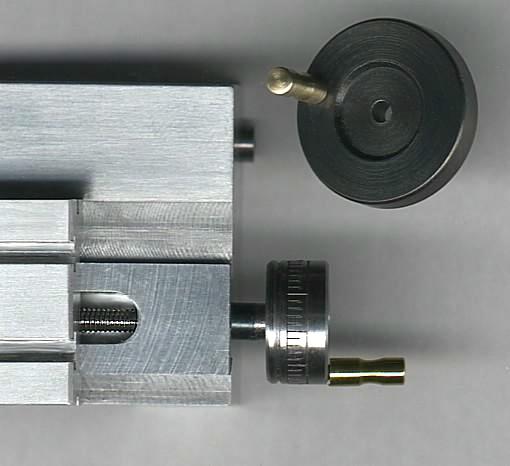
I made a left hand tap from 1/8" diameter music wire - it was great for the feed nut.
The lathe is one-eight of the volume of the original. This means that linear dimensions are one-half the length. In order to present a proper scale appearance, all threads must have a pitch twice as fine as that on the full size machine. However a true scale model must display the same number of dial graduations - in this case, fifty. Add this all up and it is evident that each graduation represents one two-thousandth of an inch, giving double the resolution of the prototype.

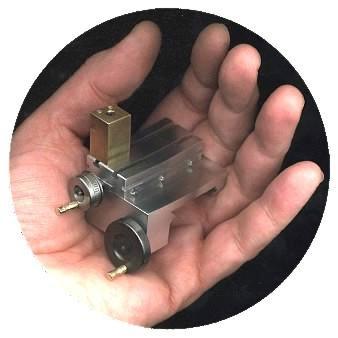
The miniature replica of the Taig four-jaw chuck is the same diameter as a wristwatch.

The apparent "curve" below in the cross slide was caused by my slight movement as the scanner bar passed that point during this 90-second exposure. .....I just wasn't cut out to be still like a statue!